Local Movers
 Last-Minute Movers
 Junk Removal
 Long Distance Movers
 Piano Movers
 Heavy Equipment
 Commercial Movers
 Moving Container
 Car Transportation
 Furniture Movers
 Truck Rental
 Moving Cost Calculator
 Moving Planner
 Packing Calculator
 Moving Checklist
 Moving Insurance
 FAQ
FAQ Contact Us
 Moving Loan
 About Us
Pack Kitchen for Moving 2026: The Ultimate Guide
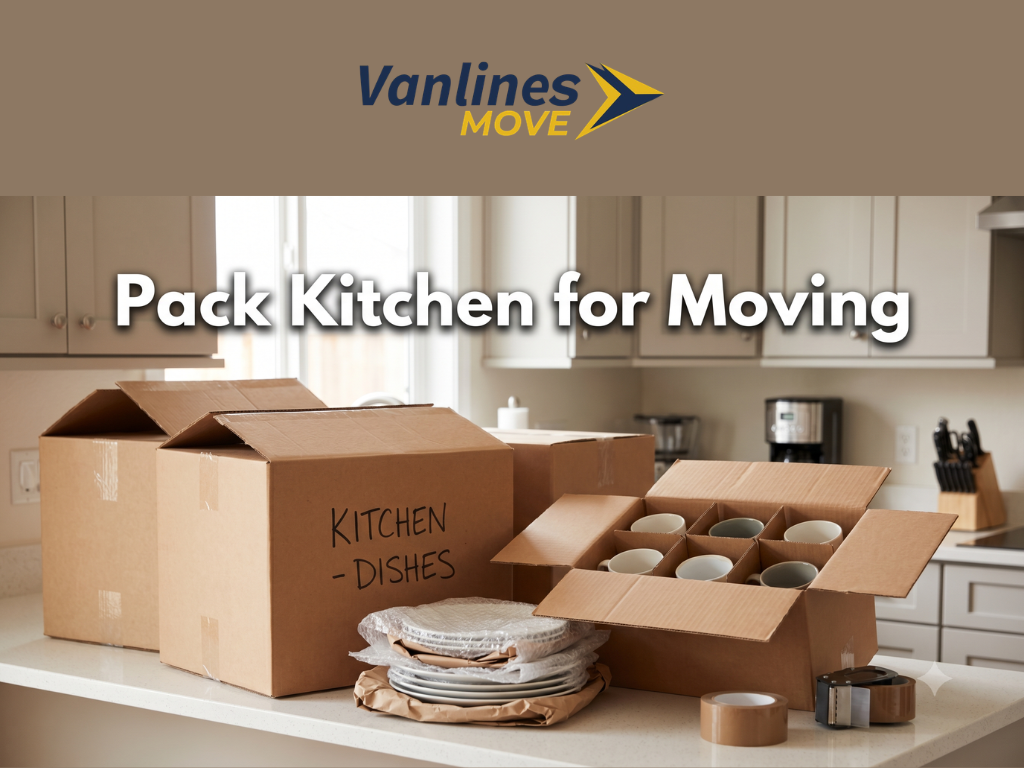
Moving a kitchen is arguably one of the most challenging aspects of relocating. It’s a room filled with a bewildering array of items: fragile dishes, sharp knives, heavy appliances, perishable foods, and an endless collection of small gadgets. The sheer volume and diversity of kitchen contents can be overwhelming, leading many to dread the packing process. However, with a strategic approach, proper planning, and the right materials, packing your kitchen for a move in 2026 can be a streamlined and stress-free experience. This comprehensive guide will walk you through every step, from decluttering and gathering supplies to packing specialized items and labeling boxes, ensuring your culinary haven arrives at your new home intact and ready for action.
The Importance of Early Planning and Preparation
Effective kitchen packing doesn't begin with a box; it begins with a plan. Starting early is paramount, especially for a room as complex as the kitchen. Rushing through the process can lead to breakage, lost items, or inefficient packing, all of which add stress and cost to your move.
Create a Master Moving Checklist
Before you even think about boxes, establish a comprehensive moving checklist. This should include timelines for decluttering, purchasing supplies, packing specific areas, and coordinating with your moving company. A detailed plan helps break down the daunting task into manageable steps.
Decluttering: The First and Most Crucial Step
The golden rule of moving is: don't move what you don't need or use. The kitchen is a prime candidate for ruthless decluttering. Over the years, we accumulate countless gadgets, expired food items, and rarely used appliances. Moving these items is a waste of time, effort, and packing materials, not to mention increasing your overall moving costs.
What to Discard, Donate, or Sell:
- Expired Food: Go through your pantry, refrigerator, and freezer. Discard anything past its expiration date.
- Unused Appliances: That bread maker you used once? The specialty blender gathering dust? If you haven't used it in a year, consider donating or selling it.
- Duplicate Items: Do you really need three can openers or four spatulas? Keep the best and let go of the rest.
- Broken or Damaged Items: Cracked plates, chipped mugs, bent utensils – these should not make the journey to your new home.
- Old Cookbooks and Magazines: Many recipes are available online. Keep only your absolute favorites or those with sentimental value.
- Plastic Containers Without Lids: A common culprit for kitchen clutter. Match lids to containers and toss any orphans.
Be honest with yourself during this process. The less you have to pack, the easier your move will be. Consider hosting a garage sale, donating to local charities, or offering items to friends and family. This decluttering phase is not just about reducing volume; it's about setting yourself up for an organized start in your new kitchen.
Inventory Your Kitchen Contents
Once decluttered, create an inventory. This doesn't need to be exhaustive for every fork, but categorize items like "dinnerware sets," "pots and pans," "small appliances," etc. This inventory will help you:
- Estimate the amount of packing supplies needed.
- Ensure nothing is left behind or lost.
- Determine appropriate packing strategies for different categories.
- Aid in filing a claim if anything is damaged during transit (though we hope this isn't necessary, consider moving insurance for peace of mind).
Gathering Your Packing Supplies
Having the right tools for the job is essential. Don't skimp on packing supplies, especially for delicate kitchen items. Quality materials will protect your belongings and make the packing process smoother.
Essential Packing Materials for the Kitchen:
- Moving Boxes:
- Small Boxes (1.5 cubic feet): For heavy items like canned goods, spices, cookbooks, and small appliances.
- Medium Boxes (3.0 cubic feet): For pots, pans, larger appliances, and pantry staples.
- Dish Packs/Dish Barrels (Specialty Boxes): These are double-walled, extra-strong boxes designed specifically for fragile items like plates, glasses, and bowls. They often come with cell dividers. Highly recommended for kitchenware.
- Large Boxes (4.5 cubic feet) and Extra-Large Boxes (6.0 cubic feet): Use sparingly for very light, bulky items like plastic containers or serving platters. Avoid putting anything heavy in large boxes.
- Packing Paper: Unprinted newsprint is ideal for wrapping dishes, glasses, and other fragile items. It provides cushioning without leaving ink marks. You'll need a lot!
- Bubble Wrap: For extra protection for highly fragile items, electronics, and small appliances.
- Packing Tape: Strong, good-quality packing tape. Avoid masking tape or duct tape. You'll need several rolls.
- Markers: Black, broad-tip markers for labeling boxes clearly.
- Labels or Stickers: For color-coding boxes or simply indicating contents and destination room.
- Scissors or Box Cutter: For opening supply boxes and cutting tape.
- Moving Blankets/Furniture Pads: For protecting larger appliances or delicate surfaces.
- Plastic Wrap/Stretch Film: Useful for securing drawers, keeping sets of items together, or spill-proofing open containers.
- Ziploc Bags: For small parts, screws from disassembled items, or organizing small utensils.
- Gloves: To protect your hands during extended packing sessions.
To estimate how many boxes you'll need, you can use an online packing calculator or consult with your moving company. It's always better to have a few extra boxes than to run out in the middle of packing.
Packing Strategy: A Step-by-Step Approach
Once you have your supplies and a decluttered kitchen, it's time to get packing. Follow a logical sequence to make the process efficient and minimize disruption to your daily routine.
Step 1: Pack Non-Essential Items First
Start with items you use infrequently. This allows you to gradually empty your kitchen without immediately impacting your daily life. Examples include:
- Holiday-themed dishes or serving platters
- Specialty small appliances (ice cream maker, waffle iron, fondue pot)
- Rarely used cookbooks
- Extra sets of dishes or glassware
- Decorative items
Step 2: Tackle the Pantry and Food Items
This is where decluttering pays off. Focus on non-perishable, unopened items.
- Canned Goods: Pack in small, sturdy boxes. They are heavy, so don't overfill boxes.
- Dry Goods (Pasta, Rice, Cereals): If unopened, pack directly. If opened, ensure they are sealed tightly in Ziploc bags to prevent spills and pests. Pack in medium boxes.
- Spices: Group together and pack in small boxes. You can use plastic wrap to secure lids if they are prone to opening.
- Liquids (Oils, Vinegar, Sauces): If they are in glass bottles, wrap individually in packing paper and place them upright in a box. Ensure lids are sealed tightly, perhaps with tape or plastic wrap, to prevent leaks. Place them in a separate box and clearly label "Liquids - Handle with Care."
- Perishables: These should be consumed or discarded before the move. Do not pack fresh produce, dairy, meats, or anything that needs refrigeration. Plan your meals in the weeks leading up to the move to use up what you have.
Step 3: Packing Dishes, Glasses, and Other Fragile Items
This is the most critical part of kitchen packing. Invest in dish pack boxes and plenty of packing paper.
Plates and Bowls:
- Place a stack of packing paper on a flat surface.
- Take one plate, place it in the center of the paper.
- Pull a corner of the paper over the plate, then turn the plate, continuing to wrap until fully covered.
- Stack 2-3 wrapped plates together, then wrap the entire stack with more paper.
- Place plates on their edge (vertically) in the box, not flat. This provides more shock absorption.
- Use crumpled paper to fill any gaps in the box.
Glasses and Mugs:
- Crumple a piece of paper and stuff it inside the glass/mug.
- Wrap the entire item individually in several layers of packing paper.
- For stemware, wrap the stem first, then the bowl, then the entire glass.
- Place glasses upright in the box, never on their side.
- Use cell dividers in dish packs if available. If not, create layers with crumpled paper between items.
Serving Platters and Large Bowls:
- Wrap individually with multiple layers of packing paper, then reinforce with bubble wrap if very delicate.
- Place on edge in a medium or dish pack box, cushioning heavily with crumpled paper.
Cutlery and Utensils:
- Sharp Knives: Bundle several knives together, then wrap the entire bundle securely in several layers of packing paper, paying extra attention to the sharp edges. Label clearly "Knives - Sharp!" and place in a small, sturdy box.
- Forks, Spoons, etc.: Bundle them together with rubber bands or plastic wrap, then wrap in packing paper. Place in a small box.
- Large Utensils: Wrap individually or in small bundles and pack in a medium box.
Step 4: Pots, Pans, and Bakeware
These items are generally sturdy but can be awkward to pack. They can also be heavy, so again, use medium boxes.
- Nesting: Stack similar-sized pots and pans together. Place a sheet of packing paper or a dish towel between each item to prevent scratching.
- Lids: Wrap lids individually and place them on top of the nested pots or stand them on their side in the box.
- Heavy Items: Place heavier pots and pans at the bottom of the box.
- Cast Iron: Wrap individually and pack in a small, sturdy box. These are very heavy.
Step 5: Small Appliances and Electronics
Toasters, blenders, coffee makers, food processors, microwaves, etc.
- Clean Thoroughly: Ensure all appliances are clean and dry.
- Original Boxes: If you still have the original boxes and packing materials, use them! They offer the best protection.
- Wrap and Cushion: If not, wrap each appliance thoroughly in bubble wrap and then packing paper.
- Cords and Attachments: Remove any detachable cords or accessories, coil them, and place them in a Ziploc bag labeled with the appliance name. Tape the bag to the appliance or pack it in the same box.
- Microwave: Remove the glass plate, wrap it separately, and pack it with the microwave. Cushion the inside of the microwave with crumpled paper.
- Heavy Appliances: Use small or medium boxes. Fill empty spaces with crumpled paper to prevent movement.
Step 6: Large Appliances (Refrigerator, Dishwasher, Oven)
Moving large appliances typically requires professional movers. However, you are responsible for preparing them.
- Refrigerator/Freezer:
- Empty completely and defrost at least 24-48 hours before the move.
- Clean thoroughly and dry to prevent mold and mildew.
- Remove shelves, drawers, and any loose parts. Wrap them individually and pack in a designated box.
- Secure doors with tape or appliance straps, but ensure there's a way for air to circulate if being stored (ask your movers).
- Dishwasher:
- Ensure it’s completely empty and dry.
- Disconnect water and power lines (or have a plumber/electrician do it).
- Secure the racks inside.
- Oven/Stove:
- Clean thoroughly.
- Disconnect gas or electric lines (professional help recommended).
- Remove racks and grates, wrap them, and pack them separately.
Always consult your appliance manuals for specific moving instructions. If you're using professional movers, confirm their policies on appliance disconnection and reconnection. For accurate moving cost estimates, it's helpful to know the size and number of large items you're transporting, which you can estimate using a moving cost calculator.
Labeling and Inventory: Your Best Friends on Moving Day
Proper labeling is not just a suggestion; it's a necessity. It will save you immense time and frustration when unpacking.
Clear and Consistent Labeling:
- Destination Room: Clearly write "KITCHEN" on at least two sides of each box.
- Contents: List the main contents (e.g., "Plates - Dinnerware," "Pots & Pans," "Canned Goods," "Small Appliances"). Be specific.
- Fragile: For any box containing breakable items, write "FRAGILE" in large, bold letters on all sides and on the top. Consider using "THIS SIDE UP" arrows.
- Essential Box: Designate one or two "Open First" boxes for your kitchen. More on this below.
Consider color-coding your boxes. For instance, all kitchen boxes could have a green sticker. This makes it easier for movers to place boxes in the correct room.
The "Open First" Box (Essentials Box)
This is arguably the most important box for your kitchen. It contains everything you'll need for the first 24-48 hours in your new home, preventing you from frantically searching through dozens of boxes for a coffee cup.
What to Include in Your Kitchen Essentials Box:
- Coffee maker, coffee, filters, mugs, sugar, creamer
- Basic cooking utensils (one spatula, one spoon)
- One pot and one pan
- A few plates, bowls, and cutlery for each family member
- Dish soap, sponge, dish towel
- Paper towels
- Garbage bags
- Can opener, bottle opener
- Salt, pepper, and a few basic spices
- Snacks for the first day
- Pet food and bowls (if applicable)
- Small cutting board and a paring knife (securely wrapped)
- Water bottles
- A small box of cereal or oatmeal
Keep this box with you or clearly label it for immediate access upon arrival.
Tips for a Smoother Kitchen Move
- Don't Overfill Boxes: This is especially true for kitchen items. Heavy items like books, canned goods, and appliances should go in small boxes. Lighter, bulkier items (like plastic containers) can go in larger boxes.
- Pack a Few Days' Worth of Meals: In the week leading up to your move, plan meals that require minimal cooking and use up perishable items. Consider takeout or simple prepared meals for the last few days.
- Clean as You Go: As you empty cupboards and drawers, give them a quick wipe down. This makes cleaning your old kitchen easier and ensures your new kitchen is ready for your items.
- Protect Countertops: If you're packing heavy items on your countertops, place a moving blanket or thick towel underneath to prevent scratches.
- Refrigerate Perishables Last: If you must transport some perishables (e.g., for a short local move), pack them in a cooler with ice packs immediately before loading the truck. Plan to unpack these first at your new home.
- Consider Professional Packing: If the thought of packing your kitchen overwhelms you, consider hiring professional movers to pack just your kitchen. They have the expertise, materials, and efficiency to handle it. You can explore options by visiting Van Lines Move Home for various moving services.
- Take Photos: Before you start packing, take photos of how your kitchen is organized, especially inside drawers and cabinets. This will be invaluable when unpacking and setting up your new kitchen.
Unpacking Your Kitchen in the New Home
Just as important as packing is the strategy for unpacking. Start with your "Open First" box to get immediate necessities. Then, focus on setting up functional areas.
- Clean First: Before unpacking anything, wipe down all shelves, drawers, and countertops in your new kitchen.
- Appliances: Unpack and set up your essential small appliances (coffee maker, toaster) and connect your large appliances.
- Pantry: Start organizing your pantry with non-perishable items. This creates a central hub for food.
- Dishes and Glasses: Unpack your everyday dishes, glasses, and cutlery. Place them in easily accessible cabinets.
- Pots and Pans: Arrange these in lower cabinets or drawers near the stove.
- Less Used Items: Finally, unpack specialty items, decorative pieces, and less frequently used gadgets.
Don't try to unpack everything in one day. Focus on making your kitchen functional, and then gradually fill in the details.
Conclusion
Packing a kitchen for a move in 2026 requires patience, organization, and a methodical approach. By decluttering early, gathering the right supplies, following a structured packing strategy for different item categories, and labeling meticulously, you can transform this daunting task into a manageable one. Remember to prioritize your "Open First" box and approach unpacking with a similar step-by-step method. With these tips, your kitchen will transition smoothly to your new home, ready to be the heart of your culinary adventures once again.
Frequently Asked Questions (FAQs)
Q1: When should I start packing my kitchen?
A1: Ideally, you should start packing non-essential kitchen items 3-4 weeks before your moving date. This allows you to gradually reduce your kitchen's contents without disrupting your daily routine too much. Essential items should be packed in the last few days.
Q2: What's the best way to pack sharp knives?
A2: Safety is paramount for sharp knives. Bundle a few knives together, then wrap the entire bundle securely in several layers of packing paper, paying extra attention to the sharp edges. You can also use bubble wrap for added protection. Label the box "Knives - Sharp!" clearly and place it in a small, sturdy box.
Q3: Can I move food items?
A3: It depends on the type of food. Perishable items (fresh produce, dairy, meats, frozen foods) should be consumed or discarded before the move. Non-perishable, unopened items (canned goods, dry pasta, spices) can be moved. Opened dry goods should be sealed tightly in Ziploc bags. Liquids should be double-bagged and packed upright to prevent spills.
Q4: Should I use my own towels or purchase packing paper for dishes?
A4: While towels can offer some cushioning, dedicated packing paper (unprinted newsprint) is generally recommended for dishes and glassware. It's designed to provide better protection, absorb shock, and won't leave lint or residue. Save your towels for protecting larger, less fragile items or for cleaning.
Q5: How many "fragile" boxes should I expect for my kitchen?
A5: The number varies greatly depending on the size of your kitchen and the quantity of fragile items. A typical kitchen might have anywhere from 5 to 15 (or more) boxes marked "fragile," including dish packs for plates, glasses, and specialty items. It's always better to overpack fragile items with cushioning than to risk breakage.
Q6: What's the purpose of an "Open First" box for the kitchen?
A6: The "Open First" or "Essentials" box contains items you'll need immediately upon arriving at your new home, such as a coffee maker, a few dishes, basic utensils, snacks, and cleaning supplies. It prevents you from having to dig through countless boxes to find necessities during the first 24-48 hours.
Q7: Do I need to disconnect my large appliances before the movers arrive?
A7: Yes, generally you are responsible for disconnecting and preparing large appliances (refrigerator, dishwasher, oven, washing machine, dryer). This often involves defrosting, cleaning, and disconnecting water, gas, or electrical lines. If you're uncomfortable doing this, hire a qualified professional (plumber, electrician) to assist before moving day. Always confirm specific requirements with your moving company.
Categories
- Long Distance Moving157
- Local Moving120
- Commercial Moving40
- Residential Moving34
- Last – Minute Moving25
- Moving Tips & Lifestyle11
- Furniture Moving9
- Moving Tips & How-To Guides8
- Moving services7
- Moving Costs & Budgeting6
- Moving Cost5
- Moving Cost Calculator5
- Moving Tips5
- Moving Guides5
- moving tips4
- Moving companies4
- state to state movers4
- Piano Moving3
- Car Transportation3
- Truck Rental3
- Moving Container3
- Local Move3
- best moving rates3
- cheap moving companies3
- affordable moving companies3
- full-service movers3
- Moving3
- Long-Distance Moving3
- Moving Cost Guides3
- Moving Tips & Planning3
- Junk Removal2
- Senior Moving2
- Senior Relocation Moving Companies2
- Moving Tools2
- Moving Estimates2
- interstate moving2
- College Moving2
- Dorm Moving2
- Tips for moving2
- cross-country move2
- International moving2
- Household moving2
- Relocation Guide2
- Moving Tips & State Guides2
- Heavy Equipment1
- Senior Moving Services1
- office moving1
- office relocation1
- employee relocation1
- Car Transport1
- Vehicle Shipping1
- Car Shipping Services1
- Artificial Intelligence1
- Office Moving Services1
- Commercial Moving Companies1
- Corporate Moving Services1
- Corporate Movers1
- full-service moving companies1
- sustainable moving companies1
- green movers1
- Moving in US1
- Best places to move in 20251
- 2025 moving1
- Full-Service Moving Companies1
- College moving services1
- Moving to College1
- Moving Season1
- Spring Moving1
- donate1
- sell1
- Movers in California1
- Movers in Studio City1
- Moving to California1
- Laws about Moving into California1
- Moving Laws1
- House moving1
- packing1
- cheap moving ways1
- Moving guide1
- moving across countries1
- international relocation program1
- move out cleaning1
- right packing supplies1
- pack while moving1
- Apartment moving1
- PODS1
- moving out1
- Long distance moving1
- state to state move1
- California movers1
- Truck Rental1
- US Territory Relocation1
- International Moving1
- Shipping & Moving Tips1
- Moving Budget Guide1
- Moving Tools & Equipment Guides1
- Moving Services & Options1
- Moving Tips & How-To Guides1
- Moving Day & Settling In1
- Mobile Home Moving1
- Moving Guide & Tips1
- Moving Tips & State Comparisons1
- Moving Tips & City Guides1
- Moving Tips & Cost Guides1
- Long-Distance Moving Tips1
- Moving Tips & Financial Planning1
- Moving Tips & Home Preparation1
- Vehicle Shipping & Auto Transport1
- Marketing & Lead Generation1
- International Moving Guides1
- Moving Costs1
- San Francisco Moving Guide1
- NYC Moving1
- Local Movers1
- Budget Moving1
- Student Moving1
- Affordable Moving1
- Specialty Moving Guides1
- Local & Long-Distance Moving1
- long distance moving1
- Boston Moving Guide1
- Europe Relocation Guide1
- Moving Costs & Specialty Moving1
- Cost of Living1
- Relocation1
- International Moving1
- Lifestyle & Relocation1
- State Guides1
- Home Buying Guide1
- Moving Timeline1
- Real Estate Tips1
- Appliance Moving1
- Packing & Preparation1
- Interstate Relocation1
- City-to-City Moving Guide1
- Technology for Movers1
- Moving Reviews1
- Moving Costs & Storage1
- Moving Tips & Equipment Guides1
- Moving Guides & Cost Insights1
- Moving Supplies1
- Packing Tips1
- Home Moving1
- Relocation Tips1
- State Moving Guides1
- New Home Guide1
- Relocation Advice1